
Web Developer Playbook: Rich Text Editor
In this article, I will show you add a rich text editor based on Draft.js to your web app. This post is part of the Web Developer Playbook series, created to provide examples, best practice, and suggestions for designing and building web services. I will be using libraries from the JavaScript ecosystem (e.g., Node.js, React.js) in all my examples.
Let’s get started!
All the code discussed in this article is contained in these gists here: PostEditor, which lets you use Draft.js to create rich text. and PostDisplay, which lets you use Draft.js to display the rich text created using the Draft.js editor.
Draft.js Overview
Draft.js is a React framework for building text editors. It’s one of many amazing frontend projects open sourced by Facebook. According to its github repo commit history, Draft.js was open sourced on Feb 22, 2016, so it has not been around for that long.
At the core of Draft.js is the Entity system, which encapsulates raw data (i.e., text) with metadata that describes how it should appear.
Entities introduce levels of richness beyond styled text. Links, mentions, and embedded content can all be implemented using entities. ~official doc
Draft.js supplies the <Editor /> component (docs) which is built on top of the entity system. We are going to use the <Editor /> and a few plugins created for Draft.js to create our rich text editor.
A few important things to note for the <Editor /> component:
-
It takes an
editorStateobject and anonChangefunction as props. TheeditorStateobject represents the entire state of a Draft editor, including the fully decorated representation of the contents. TheonChangefunction to be executed by the Editor when edits and selection changes occur. -
There are two ways to create an
editorState:- Use
EditorState.createEmpty, which returns a newEditorStateobject with an emptyContentStateand default configuration. - Use
EditorState.createWithContent, which returns a new EditorState object based on the ContentState and decorator provided.
- Use
As we will see later, we will use createEmpty to create the editor for creating rich text and we will use createWithContent to create the readOnly editor to display the rich text.
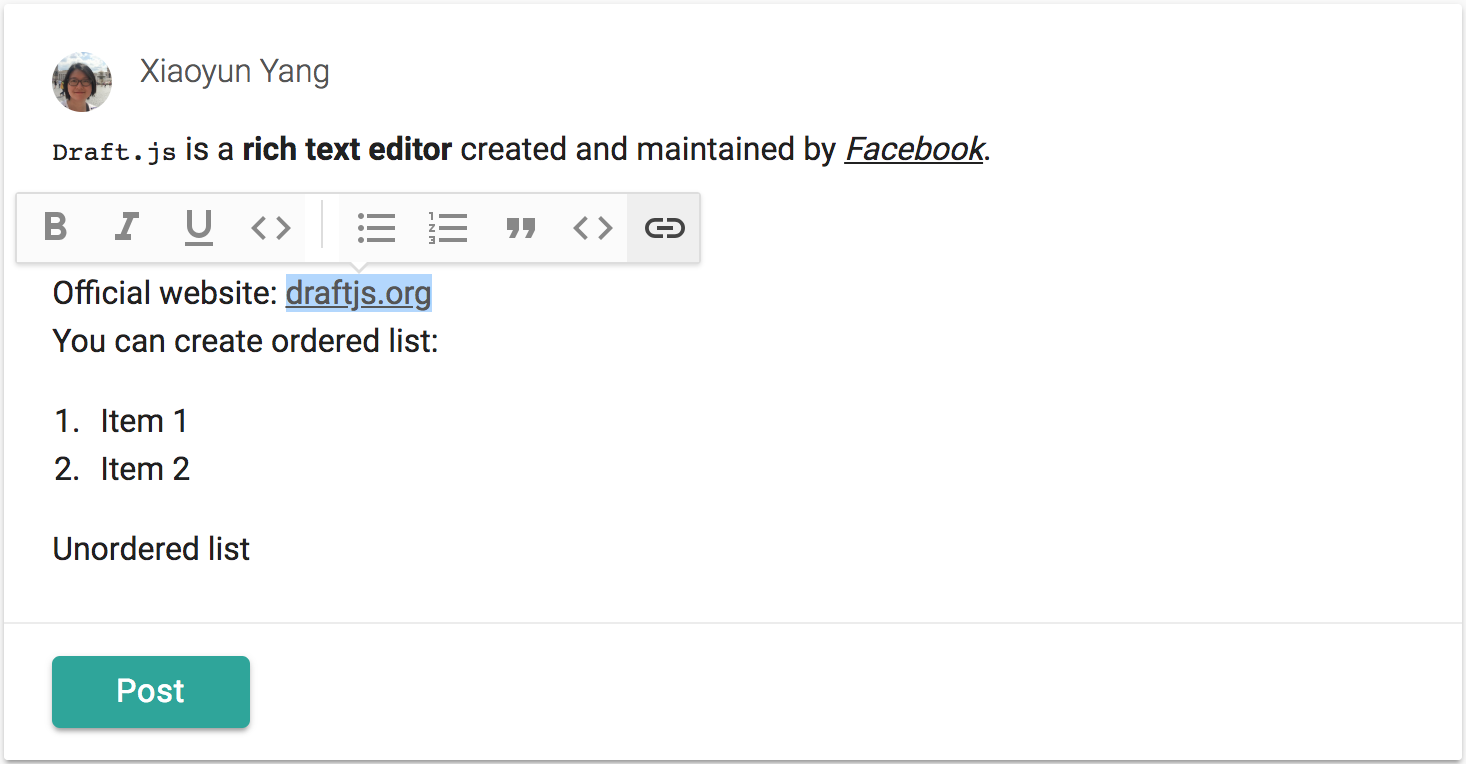
The following video (or click this link) contains a preview of the Rich Text editor that Draft.js lets us build. I will show you how to get this set up in your project.
Before we install dependencies and start writing code, let’s first go over all the plugins we will use.
Draft.js, being highly customizable, has a lot of great plugins to do everything from shortcuts for mentions and hashtags shortcuts like in Twitter to adding stickers and emojis to the text areas.
For this tutorial, we are going to use these three plugins:
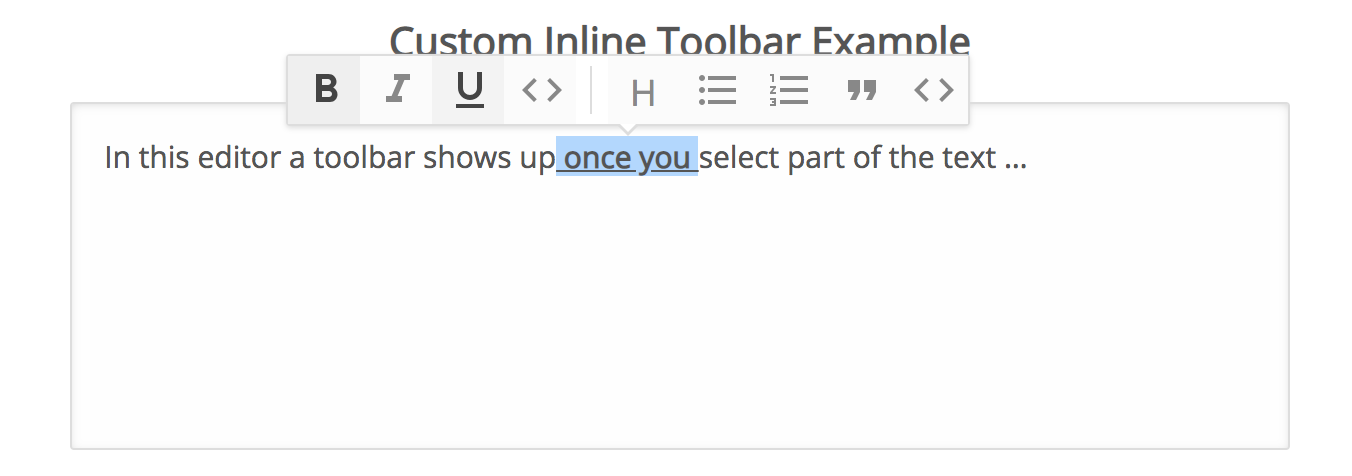
Inline Toolbar
This plugin draws a a little toolbar in a tooltip when you select text to add style to the selected text.
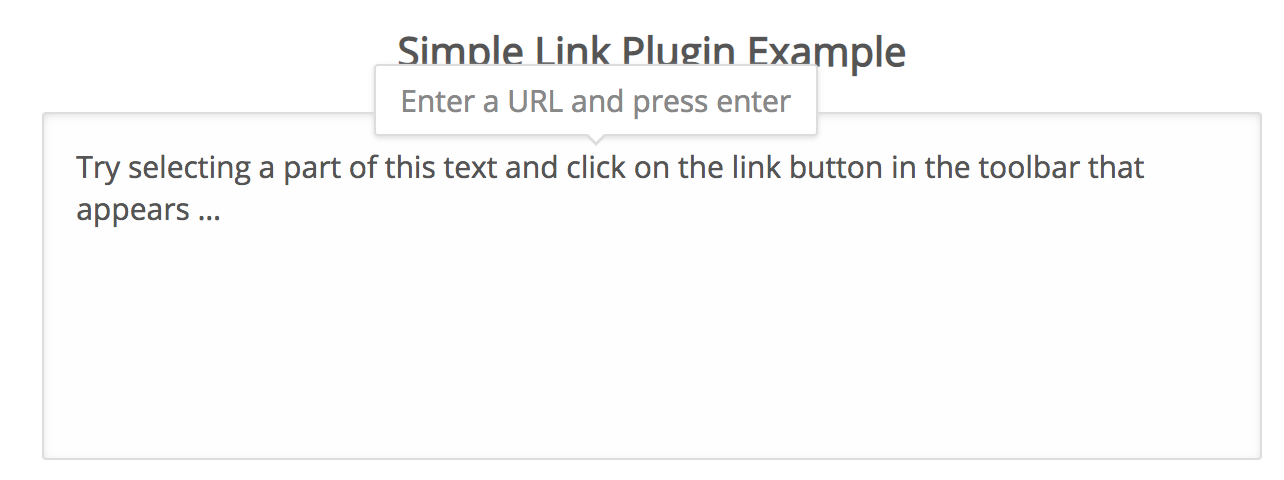
Anchor Plugin
This plugin is an add-on to the Inline Toolbar plugin. It lets you add a hyperlink to any selected text.
Markdown Plugin
This plugin lets us use markdown shortcuts to create styles. This is super useful for things like ordered lists and unordered lists.

Quick Setup
Let’s install all the dependencies:
$ npm install --save draft-js
$ npm install --save draft-js-plugin-editor
$ npm install --save draft-js-buttons
$ npm install --save draft-js-inline-toolbar-plugin
$ npm install --save draft-js-anchor-plugin
$ npm install --save draft-js-markdown-plugin
Where
reactandreact-domare both dependencies fordraft-js.draft-js-plugin-editoris needed for all the plugins.draft-js-buttonsis a dependency fordraft-js-inline-toolbar-plugin
We also need to make sure the HTML file has this line in <head></head> block:
<meta charset="utf-8" />
In addition, we need to import Draft.css into our project:
import 'draft-js/dist/Draft.css';
If you are using create-react-app, add the import statement to your index.js file.
Create An Editor
We are going to create a component called <PostEditor /> (see code) which incorporates the Draft.js <Editor /> and the three plugins discussed above. In the video showcase above, I show the editor inside of a materializeCSS card component (if you are interested).
This is how you call the <PostEditor /> component. It takes four props:
handlePost- The parent component’s function for handling the posting of data collected from the Draft.js editor when user presses the “post” button.placeholder- The text diplayed in the Draft.js Editor when there is no text input. The default is “Write something…”userDisplayName- The username you see displayed on top of the Draft.js editor in the example.userPic- The user picture you see displayed on top of the Draft.js editor in the example.
I’m not going to walk through line-by-line what’s in here. You can refer to the official doc for Draft.js and the tutorials from the DraftJS Plugins website for the Inline Toolbar and the Anchor Plugin. I will, however, point out a few Gotchas and hurdles that I had to work through to get the editor working.
Gotcha 1: Client Render Only
If you are building an isomorphic web app where you are doing both server-side rendering and client-side rendering, make sure the Draft.js code is only rendered on the client side. Otherwise, you’ll get an id-mismatch error like this:

This issue was discussed in detail here. Basically, the ids created inside the Editor is pseudo-random. Every time you refresh the page, the hash changes. To avoid the id-mismatch error in your isomorphic app, my workaround is to use componentDidMount to toggle a state variable for the <PostEditor /> component called clientModeOn (a boolean) to make sure the server application renders null while the client application renders Editor.
Gotcha 2: Placeholder
The placeholder appears behind a bullet as shown here:
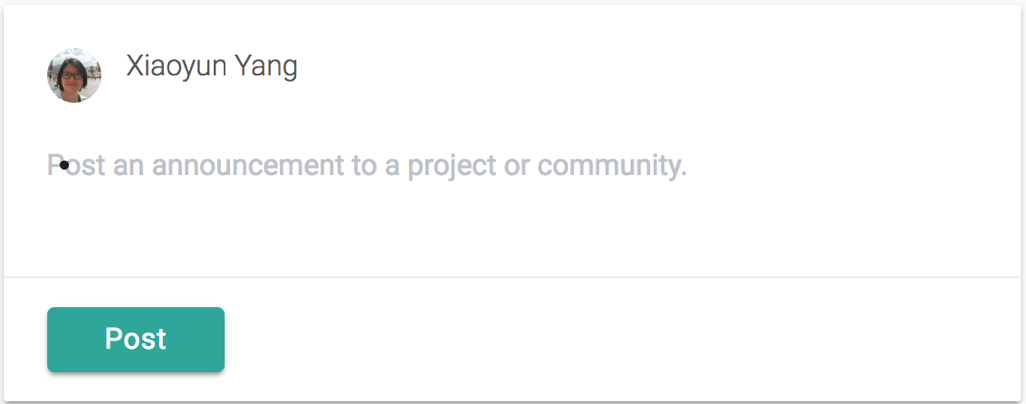
As discussed here and here, placeholder renders conditionally if there is text in Editor but it still renders if you have a single unordered-list-item block without any text. Having the bullet directly on top of the placeholder text is obviously not acceptable. Some users of Draft.js prefer to have the placeholder shifted to the right to the right of the bullet. My workaround is to add some logic to make the placeholder value an empty string if there is any decorator like ordered list or unordered list in <Editor />.
The following function was added to the <PostEditor /> component:
renderPlaceholder(placeholder, editorState) {
  const contentState = editorState.getCurrentContent();
  const shouldHide = contentState.hasText() ||
   contentState.getBlockMap().first().getType() !== 'unstyled';
  return shouldHide ? '' : placeholder;
}
Post Content
Within the <PostEditor /> component, there’s a function called handlePost:
handlePost() {
  const content = this.state.editorState.getCurrentContent();
  // content to save to the db
  const contentToSave = JSON.stringify(convertToRaw(content));
  this.props.handlePost(contentToSave);
}
When you press the “post” button, this function is executed to convert the editorState into a string. Specifically:
convertToRaw(content) is an object in the following form:
{blocks: Array(2), entityMap: {…}}
Then JSON.stringify converts the JSON into a string, a format which we could save to the database.
Fetch and Display Content
Next, we are going to create a component called <PostDisplay /> (see code) which displays the the rich text generated from a Draft.js Editor.
This component is significantly simpler than the <PostEditor /> component. It takes a few props:
editorContent- The stringified version of the Draft.js editor content saved to the database.userDisplayName- The username you see displayed on top of the Draft.js editor in the example.userPic- The user picture you see displayed on top of the Draft.js editor in the example.
After converting the editorContent back to EditorState, We use the same Draft.js Editor component to display a readOnly version of the rich text:
<Editor
  editorState={convertToEditorState(editorContent)}
  readOnly
/>
The convertToEditorState function is a custom function I wrote to get the stringified editor content back into the editorEditor format:
const convertToEditorState = (editorContent) => {
  const content = convertFromRaw(JSON.parse(editorContent));
  const editorState = EditorState.createWithContent(content, decorator);
  return editorState;
};
For the post part, everything is exactly in reverse of the process for converting the editorState into the contentToSave from the <PostEditor /> component’s handlePost function but there’s one key gotcha: When we use EditorState.createWithContent, we need to pass the decorator also:
EditorState.createWithContent(content, decorator)
where decorator is:
const decorator = new CompositeDecorator([{
  strategy: findLinkEntities,
  component: Link
}]);
and findLinkEntities and Link are:
function findLinkEntities(contentBlock, callback, contentState) {
  contentBlock.findEntityRanges(
    (character) => {
      const entityKey = character.getEntity();
      return (
        entityKey !== null &&
        contentState.getEntity(entityKey).getType() === 'LINK'
      );
    },
    callback
  );
}
const Link = (props) => {
  const {url} = props.contentState.getEntity(props.entityKey).getData();
  return (
    <a rel="nofollow noreferrer" href={url} target="_blank">
      {props.children}
    </a>
  );
};
This code is basically taken directly from the Draft.js Github Page Link Example.
If we don’t pass the decorator, everything else like code block, bold text, quote etc will still render correctly in the Draft.js Editor because these are regular text with properties controlled by CSS and the style attribute. With Link, however, we need the decorator to create an anchor tag.
Link is the only non-text-based entity we are using in this example so that’s the only decorator we are using with createWithContent. If you use other plugins like emoji, mention, or hashtag.
The Result
Resources
- Awesome Draft.js - Awesome list of Draft.js resources
- Saving Draft.js data to server by React Rocket
- Draft.js Playgrounds
- 5 part tutorial on Draft.js by Siobhan Mahoney
- A Beginner’s Guide to Draft.js by Adrian Li
